Garlic Shrimp Tapas with Sourdough
Garlic shrimp tapas with olive oil, parsley and a little chili, served with crisp sourdough for dipping. A small sharing dish for two, ready in about 20 minutes.
View saved recipes · Saved on this device.
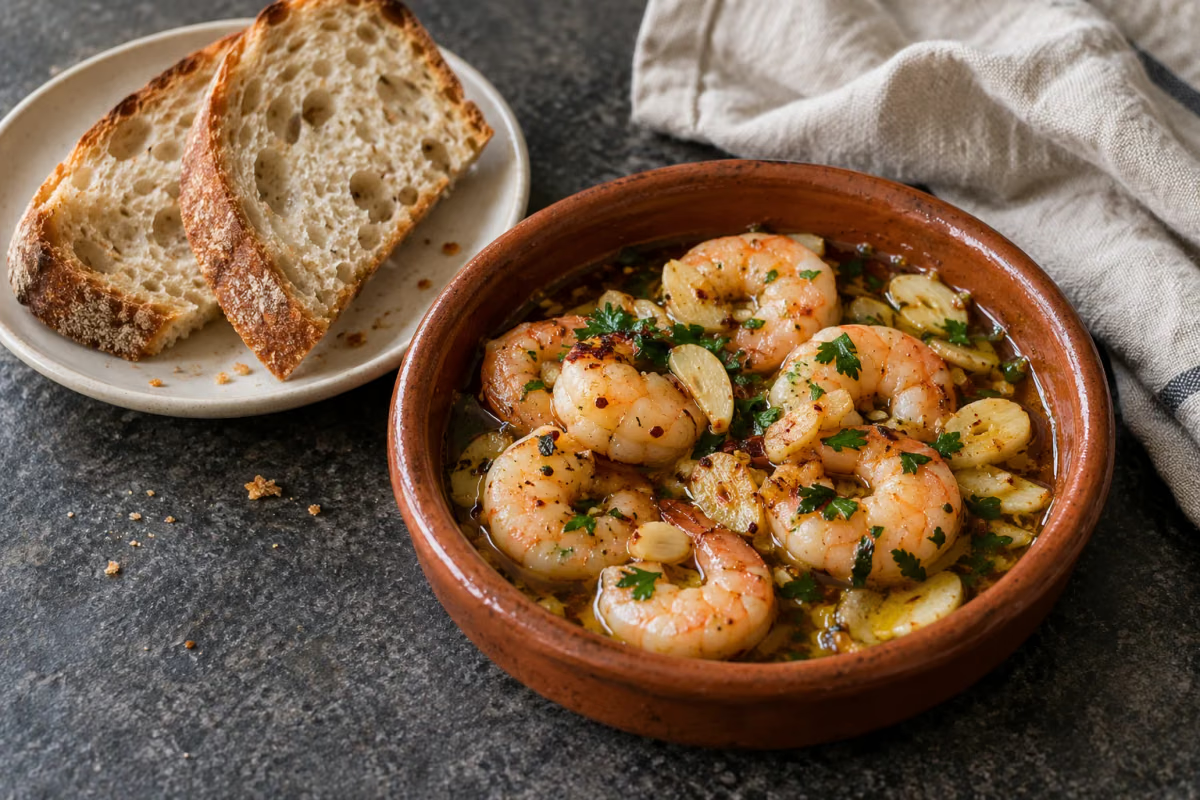
Garlic shrimp tapas gives a couple of sourdough slices a purpose: scoop up the warm garlic oil after eating the shrimp. This small sharing dish takes its cue from gambas al ajillo, with peeled shrimp, sliced garlic, olive oil and a restrained amount of chili. The bread stays beside the dish so it can be dipped a bite at a time.
Use a small frying pan for cooking and a shallow bowl for serving. A decorative terracotta dish is not necessarily safe on the hob. Have the parsley chopped and bread ready before the shrimp goes in; the final few minutes need your attention. These quantities make a starter or one part of a tapas lunch, rather than a large main course.
Garlic Shrimp Tapas with Sourdough
- Makes
- 2 small servings (a shared dish with 1 slice of bread each)
- Prep · estimate
- 10 min
- Cook · estimate
- 10 min
- Total · estimate
- 20 min
Ingredients
- 250 g peeled weight large raw shrimp, fully thawed if frozen, deveined and tails removed
- 2 slices (120 g total) sourdough, about 1.5 cm / ⅝ inch thick
- 3 tbsp (45 ml) olive oil
- 4 medium cloves (12 g) garlic, peeled and thinly sliced
- ¼ tsp dried chili flakes, or less to taste
- 1 tbsp (4 g) flat-leaf parsley, washed, dried and chopped
- ⅛ tsp fine salt, plus more only if needed
- 1 small pinch freshly ground black pepper
- 2 wedges lemon, optional, to serve
Method
Prepare everything before heating the pan
Pat the thawed shrimp dry with kitchen paper and put them on a plate reserved for raw seafood. Slice the garlic and prepare the parsley on a clean board. Set out a clean serving bowl. Keep raw shrimp and its juices away from the bread and ready-to-eat ingredients; wash your hands and utensils after handling it.
Get the bread crisp
Toast the sourdough on both sides until golden and firm enough for dipping, about 3–5 minutes depending on your toaster. Set it on a rack rather than stacking the slices, so steam does not soften the crust. If using a toaster, start the garlic while the bread toasts.
Warm the garlic oil gently
Put the olive oil and sliced garlic in a small frying pan, about 20 cm / 8 inches across. Set over medium-low heat for about 2–3 minutes, swirling occasionally, until the garlic smells fragrant and just starts to color at its edges. Stir in the chili. Lower the heat if the garlic darkens quickly; dark brown garlic will make the oil bitter.
Cook the shrimp through
Raise the heat to medium, add the shrimp in one layer and sprinkle with the salt. Cook for about 2 minutes, then turn and cook for another 2–3 minutes, adjusting for their size. The thickest part should reach 63°C/145°F; the flesh should be firm and opaque throughout. If the pan is crowded, cook in two batches rather than piling the shrimp up.
Finish and serve
Take the pan off the heat as soon as the shrimp is cooked. Fold in the parsley and black pepper, then transfer the shrimp and garlic oil to the clean shallow bowl. Serve at once with the sourdough and optional lemon wedges. Dip the bread as you eat, and take care with the hot oil.
Developed for home use; not kitchen-tested by Sourdough Bench. Times are estimates; use the doneness cues in the steps.
Small things that help
- Thaw before you start
- Defrost frozen shrimp in a covered container in the refrigerator, then drain and pat dry. Thawing time is extra to the 20 minutes shown here. Adding frozen shrimp directly makes the oil spit and releases water into the sauce.
- Watch the garlic rather than the clock
- Thin garlic slices color quickly, especially in a heavy pan that holds heat. If they become dark brown before the shrimp is added, start the oil and garlic again; parsley and lemon will not hide a burnt flavor.
- Scale the pan with the recipe
- For four people, double the ingredients and use a wider frying pan or cook two batches. Keep the bread separate until serving so each slice stays crisp.
Make it your own
- Make it mild
- Omit the chili flakes and add a little extra black pepper at the table. The garlic and parsley still give the oil plenty of flavor.
- Use smaller shrimp
- Use the same peeled weight of smaller raw shrimp, checking them earlier. Their cooking time will be shorter; use the doneness cues rather than automatically following the full time.
Make ahead & storage
This dish is best eaten just cooked. Refrigerate leftover shrimp and its oil in a shallow covered container within 2 hours, or within 1 hour above 32°C/90°F. Keep at 4°C/40°F or below and use within 2 days for best texture. Store bread separately. Reheat the shrimp thoroughly to 74°C/165°F; it may become firmer on reheating. Do not keep the garlic oil at room temperature.
Dietary notes
Ingredients to check
Contains crustacean shellfish and wheat. Check the bread label for any additional allergens. For a larger lunch, serve with a tomato salad or cooked vegetables alongside.
Before you start
Can I make garlic shrimp tapas with cooked shrimp?
Raw shrimp is the intended ingredient because it cooks in the garlic oil. Previously cooked shrimp can become rubbery if you follow the same timing. Use a recipe written for cooked shrimp instead, or choose raw peeled shrimp for this version.
Do I need a terracotta pot?
No. A small frying pan works well. Transfer to an ordinary serving dish afterward; only put terracotta over direct heat if its maker specifically says it is suitable.
Can I prepare the dish before guests arrive?
You can thaw and peel the shrimp, slice the garlic and wash the parsley ahead, keeping the shrimp refrigerated separately. Cook just before eating and toast the bread at the same time.
Sources & inspiration
- Omar Allibhoy for Good Food: Gambas al ajillo
Inspiration for shrimp cooked with garlic, olive oil, chili and parsley. Our peeled-shrimp quantities, sourdough accompaniment and cooking instructions are developed separately.
- FDA: Selecting and serving fresh and frozen seafood safely
Seafood thawing, separation, cooking temperature and shrimp doneness guidance.
- FoodSafety.gov: Four steps to food safety
Prompt refrigeration, shallow containers and safe food handling.
Recipe writing and serving illustrations are created for Sourdough Bench. Inspiration credits identify the source of an idea; they do not imply that another author tested this recipe. How we publish.


