Your first starter begins as a jar of flour and water. The satisfying part is learning its rhythm: feed, rise, peak, fall. You are looking for that pattern to become dependable.
Leave room in your calendar. Plan for at least a week or two, and sometimes longer. Day six is a checkpoint, not a promise. Illinois Extension notes that establishing a stable starter can take 14 days to a month.
First, the formula.
To start your jar
- Water
- 100g
- White bread flour
- 50g
- Whole wheat flour
- 50g
Mix together → 200g starter mixture
Keep 100g. Feed 100g + 100g.
100g retained starter + 100g water + 50g white bread flour + 50g whole wheat flour = 300g.
That is 1 : 1 : 1 — starter : total flour : water, by weight.
At the next feed, keep 100g of that 300g and remove the rest before adding fresh ingredients. Keeping half every time would change the ratio. Weighing the same amount keeps each feed comparable.
This mixture has 100% hydration: equal weights of water and total flour. “100%” does not mean that the jar is all water. The white and whole wheat flours each supply half of the flour.
Prefer a smaller jar? Halve every quantity: start with 50g water + 25g of each flour; feed 50g retained starter + 50g water + 25g of each flour. Keep the same proportions.
What you need on the counter
A digital scale, a clean straight-sided jar of roughly 1 litre, a spatula, a loose-fitting lid and a rubber band. Leave plenty of room above the mixture for it to expand.
Use plain, unbleached white bread flour and whole wheat flour; keep the blend consistent while you learn the routine. See how flour types differ.
Aim for a steady 21–26°C / 70–78°F. Lukewarm water can help in a cool kitchen; use cooler water in a warm room. Avoid hot water and direct heat. A loose lid helps prevent drying while allowing gas to escape.
Your first days with the jar.
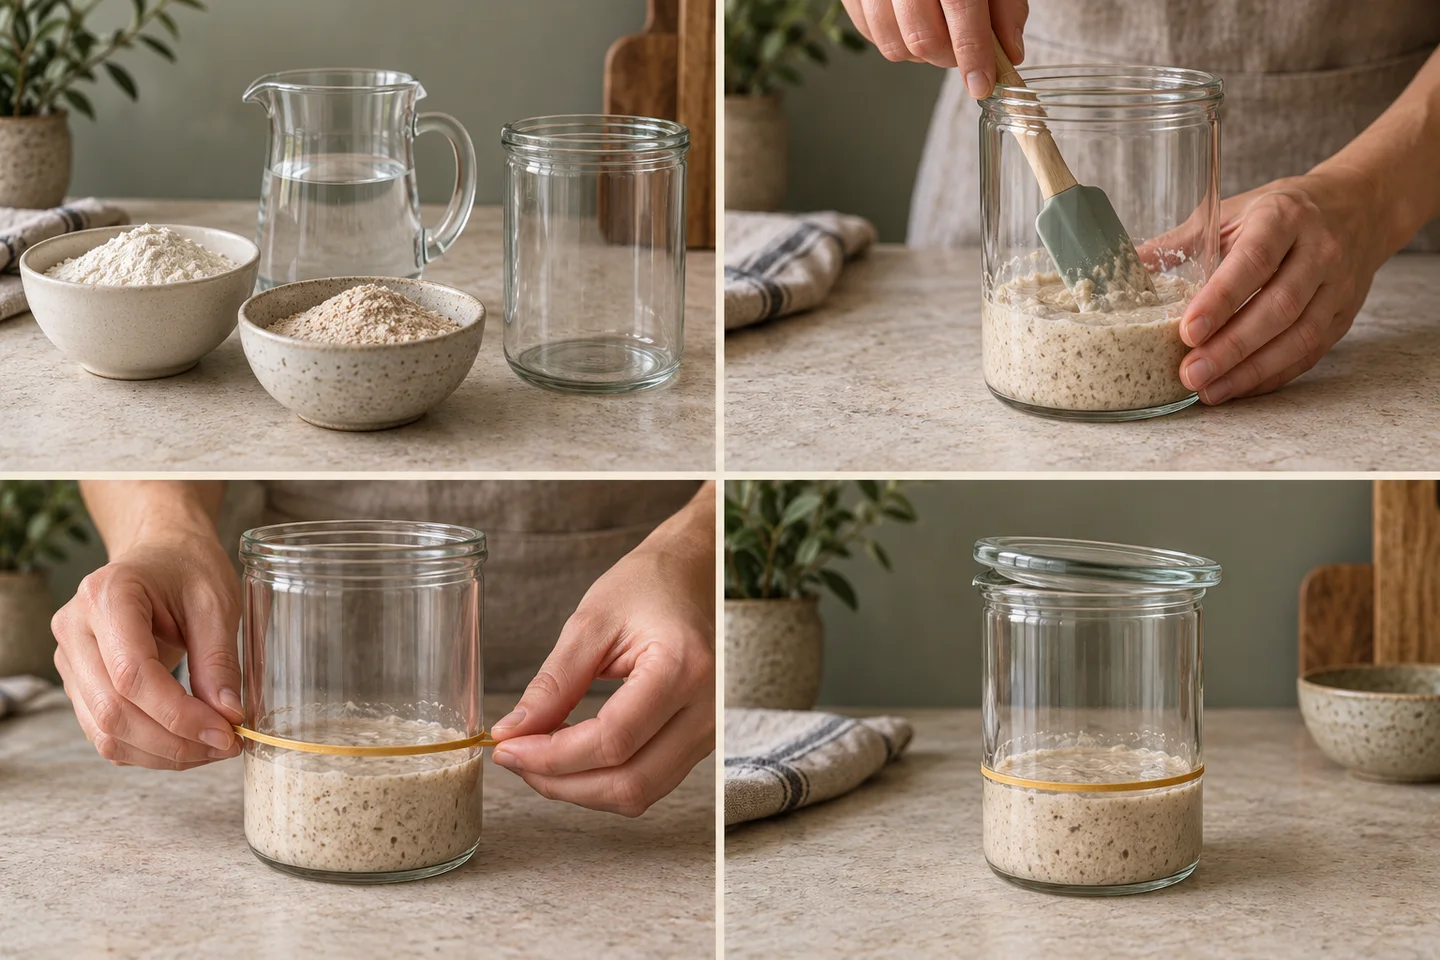
Make the first mixture.
Mix the starting ingredients until no dry flour remains. Scrape down the jar, mark the level and cover loosely. Leave at warm room temperature for about 24 hours.
Give it its first feed.
Keep 100g and use the feeding formula above. Mix, mark and cover again. Wait about 24 hours. Feed even if you cannot see bubbles yet.
Begin a morning-and-evening rhythm.
Repeat the same feed approximately every 12 hours. Record the time and how high it rises before the next feed.
Repeat. Watch what changes.
Continue the morning and evening feeds. Compare the jar with its starting mark; note bubbles, aroma and any rise-and-fall line.
Look for a reliable response.
Keep feeding while you check the signs below. If the starter is still slow or erratic, give it more days. Do not book a bake around its birthday.
This schedule follows King Arthur’s feeding routine, adapted to the quantities and 50:50 flour blend above.
Ready is a pattern.
For this equal-weight feed at warm room temperature, look for these signs together over several consecutive feeds:
- A dependable rise. It roughly doubles within about 6–8 hours after feeding.
- Bubbles through the mixture. Check the sides as well as the surface.
- A pleasantly tangy aroma. Mildly fruity or yeasty notes can accompany it.
King Arthur’s baking guide uses a vigorous, predictable rise to judge readiness. Use an established starter near its peak for a recipe calling for ripe or active starter; save a portion to feed again.
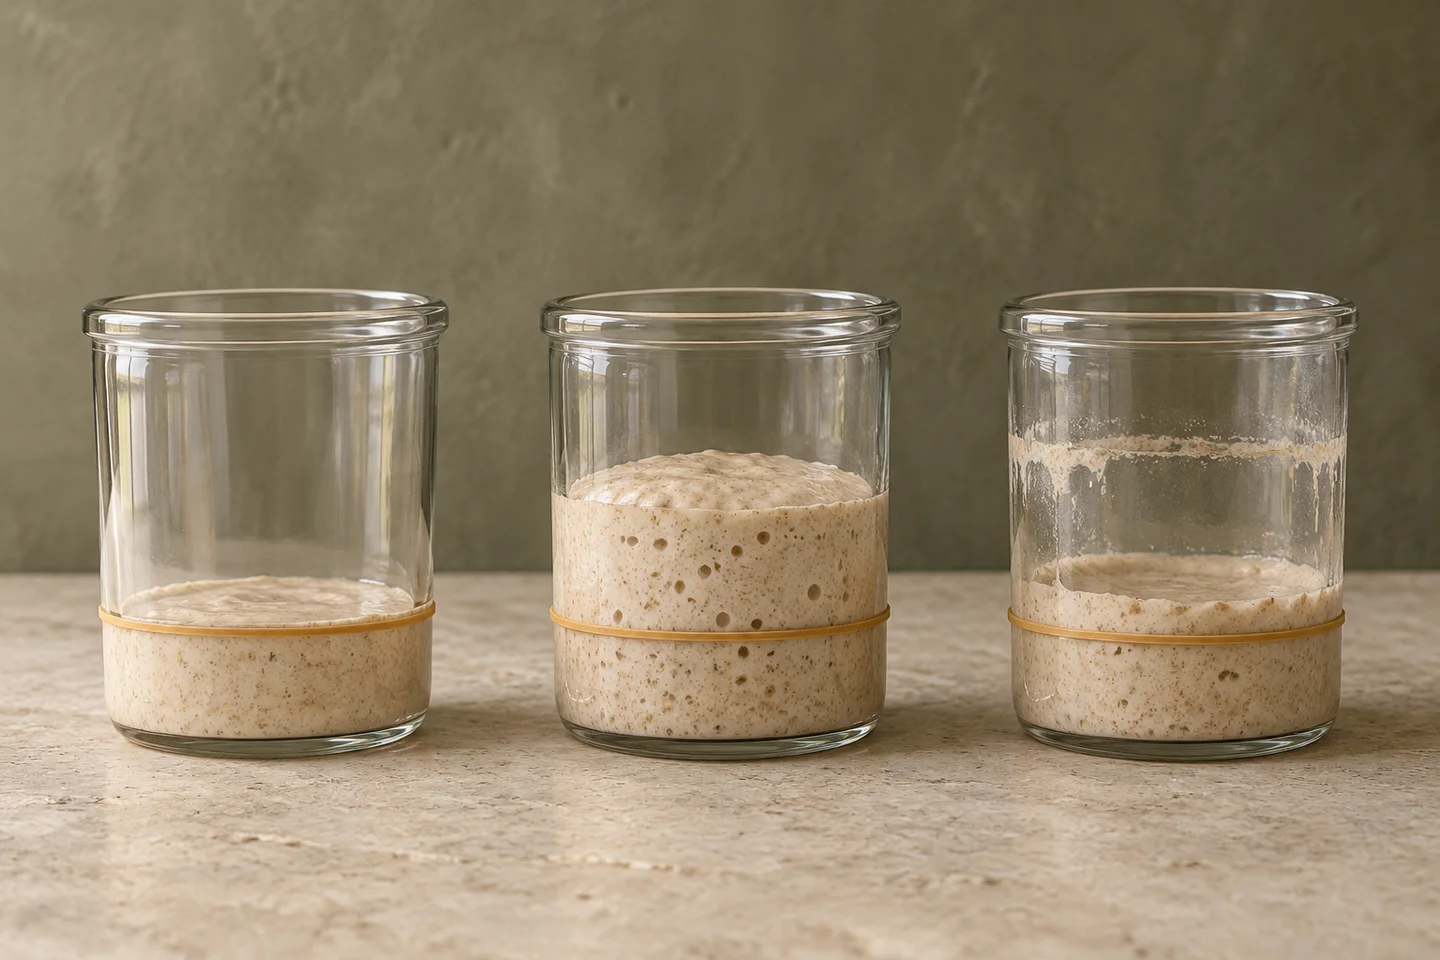
In the three-jar picture, the band records the starting level. A line above the current mixture means it has already risen and fallen. The number of bubbles alone cannot tell you whether it is at its peak.
A strong alcohol smell can mean it needs food. It is not a shortcut to proving maturity, and neither is the calendar.
A little care, every time.
What if nothing seems to happen?
Check the actual temperature beside the jar, your gram amounts and the flour you used. A cooler kitchen slows the process. Keep a small note of each feed so that a quiet day does not erase the progress you have seen.
Keep the mixture loosely covered and continue the routine if there are no signs of spoilage. More detail: building a starter from scratch.
When should I throw it out?
Discard the whole starter if you see mold, fuzzy growth, or pink or orange patches or streaks. Do not scrape the surface and keep the mixture underneath. Clean the container thoroughly before starting again.
A liquid layer can occur in a hungry established starter, but color alone cannot establish safety. If you cannot distinguish normal separation from spoilage, start over. See King Arthur’s troubleshooting photographs.
Can I taste it or cook with the early discard?
Do not taste raw starter. Flour is a raw ingredient. Wash hands and utensils, and keep the jar clean.
Discard the excess during these early establishment days. Once the starter is mature and healthy, use its discard in recipes that cook or bake it thoroughly. Colorado State Extension explains the food-safety steps.
How do I keep a mature starter?
Keep feeding an active room-temperature starter regularly. If you bake less often, an established starter can live in the refrigerator with approximately weekly feeding.
Before baking, bring it back to room temperature and feed until it again rises predictably. The number of feeds depends on its condition; one fixed recovery time will not suit every jar. Follow King Arthur’s maintenance instructions or our refrigeration guide.
Sources & method notes
This is an editorial adaptation of a supplied starter method, keeping its white-flour and whole-wheat blend. Fixed retained quantities, feeding intervals and readiness checks were cross-checked against the sources below. It is not a report of a Sourdough Bench test bake or a claim that the exact blend was tested by those sources.
The two newly created images are AI illustrations, not photographs documenting a starter’s development. Your mixture may look different.
- King Arthur Baking: Building a sourdough starter
- Colorado State University Extension: Sourdough starter best practices
- University of Illinois Extension: Sourdough Bread 101 (PDF)
- King Arthur Baking: Beware the sourdough starter fake out
- King Arthur Baking: When your starter is ready to bake
- King Arthur Baking: Starter troubleshooting
- King Arthur Baking: Feeding and maintaining a starter